First Steps — Your First 10 Minutes with Acclo IQ
What Happens on First Launch
Section titled “What Happens on First Launch”When you open Acclo IQ for the first time, you’ll see a welcome screen. The app has already set up everything you need behind the scenes:
- Categories and subcategories for common spending (Restaurants, Groceries, Utilities, and more)
- Hundreds of merchant rules that auto-categorize transactions from well-known merchants
- Format profiles for major banks so CSV imports work out of the box
You’ll also see a checkbox for usage telemetry — this helps us count how many people use the app, contains zero financial data, and you’re always in control. You can change this anytime in Settings > License. See the privacy reference for details.
Click Get Started to enter the app.
Set Up Your First Account
Section titled “Set Up Your First Account”Your first stop is creating an account that represents one of your real bank or credit card accounts.
-
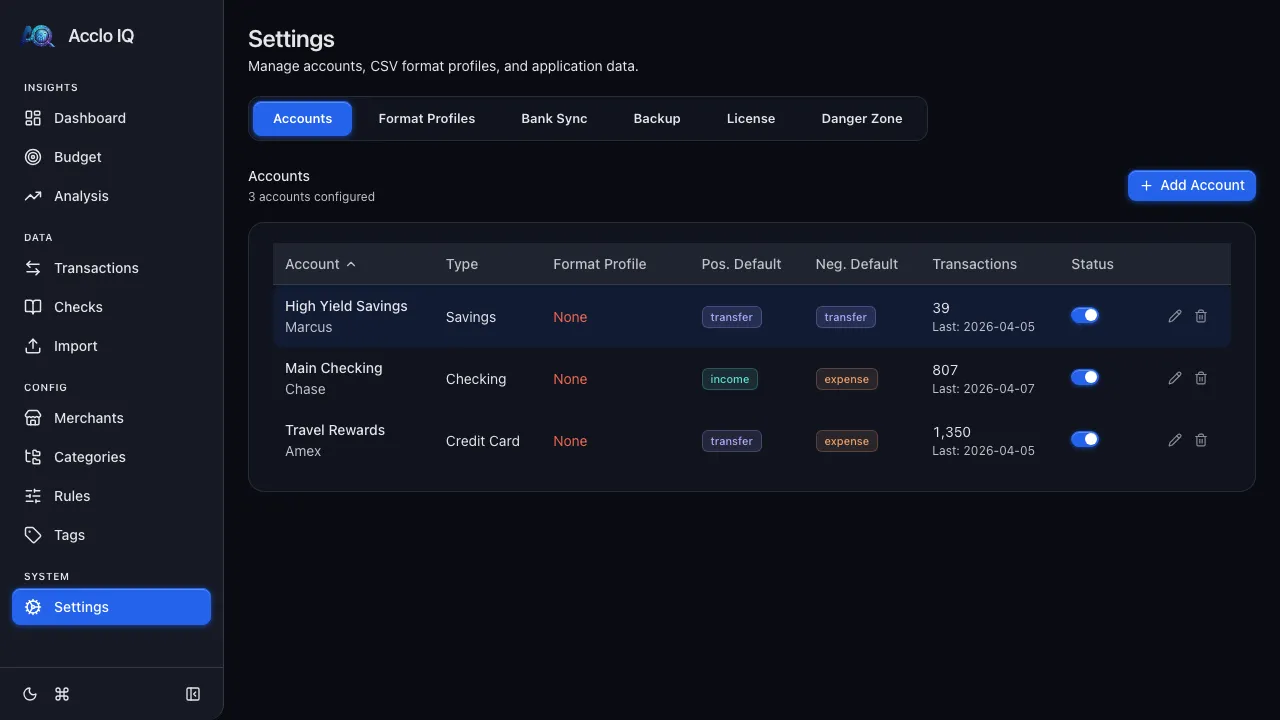
Open Settings
Click Settings in the sidebar, then the Accounts tab.
-
Add an account
Click Add Your First Account and fill in:
- Account Name — something you’ll recognize, like “Chase Checking” or “Amex Gold”
- Institution — your bank name (e.g., “Chase”, “Wells Fargo”)
- Account Type — Checking, Savings, Credit Card, Investment, Cash, Loan, or Money Market
-
Done — ready to import
After creating the account, you’ll see two options: Done (go back to Settings) or Import CSV (go straight to import). Click Import CSV to continue.
Import Your First Transactions
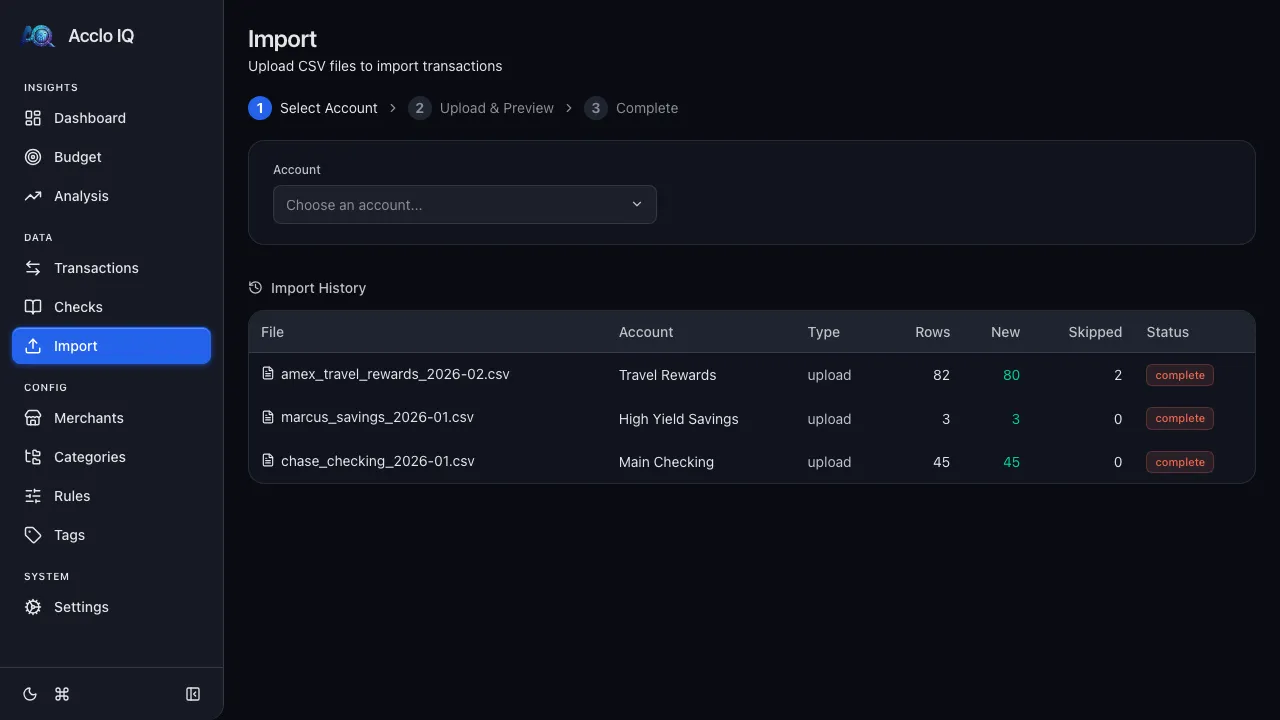
Section titled “Import Your First Transactions”The Import page walks you through a simple 3-step process.
-
Select your account and format profile
Your new account is pre-selected. Choose the format profile that matches your bank’s CSV layout — if your bank has a built-in profile, it’s already selected. If not, click Create a new format profile and upload a sample CSV. The app will auto-detect the column layout.
-
Upload your CSV
Drag and drop a CSV export from your bank, or click to browse. The app parses the file, checks for duplicates, and shows you a preview with statistics: how many transactions are new, how many are duplicates (already imported), and the date range.
-
Confirm the import
Click Import to bring the transactions into the app. The rule engine runs automatically and categorizes every transaction it recognizes.
Explore Your Dashboard
Section titled “Explore Your Dashboard”After importing, head to the Dashboard — it’s the first item in the sidebar.
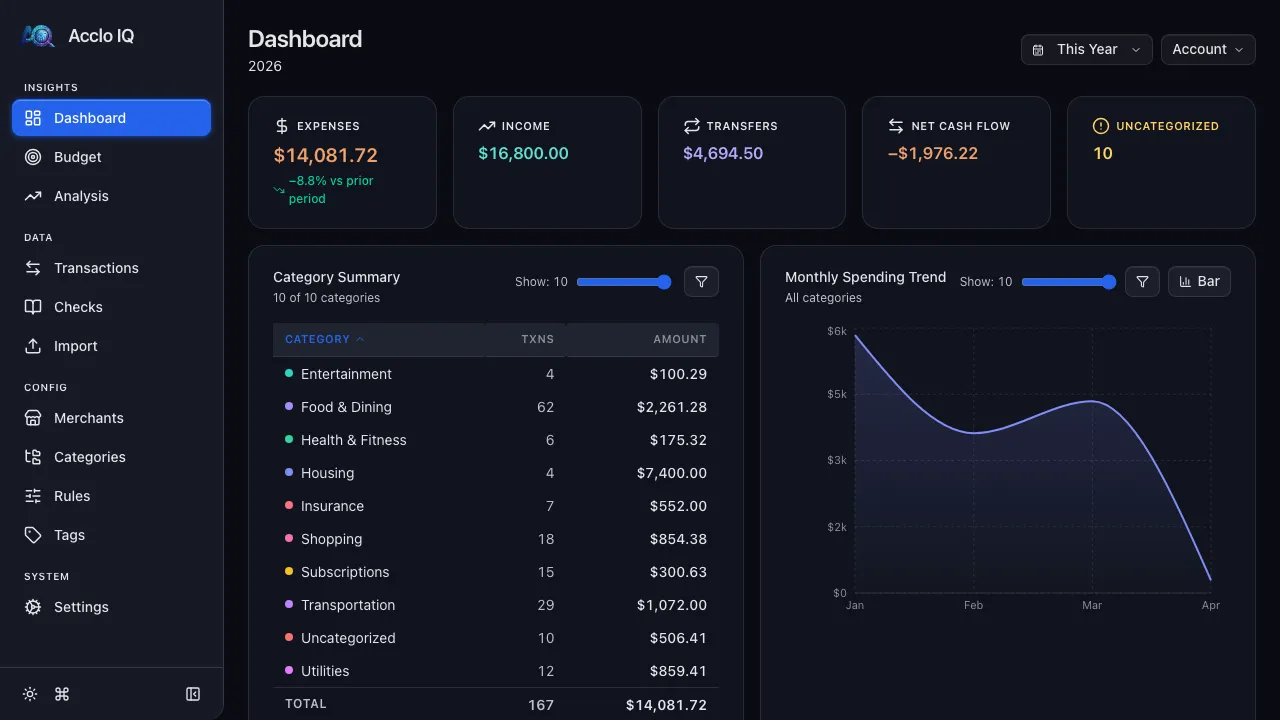
You’ll see your financial picture come together immediately:
- KPI cards — total expenses, income, transfers, net cash flow, and uncategorized count
- Spending trend chart — how your spending changes over time
- Category summary — where your money goes, ranked by amount
- Merchant summary — your top merchants
Click any category or merchant to drill down to the matching transactions.
Review and Fix Categories
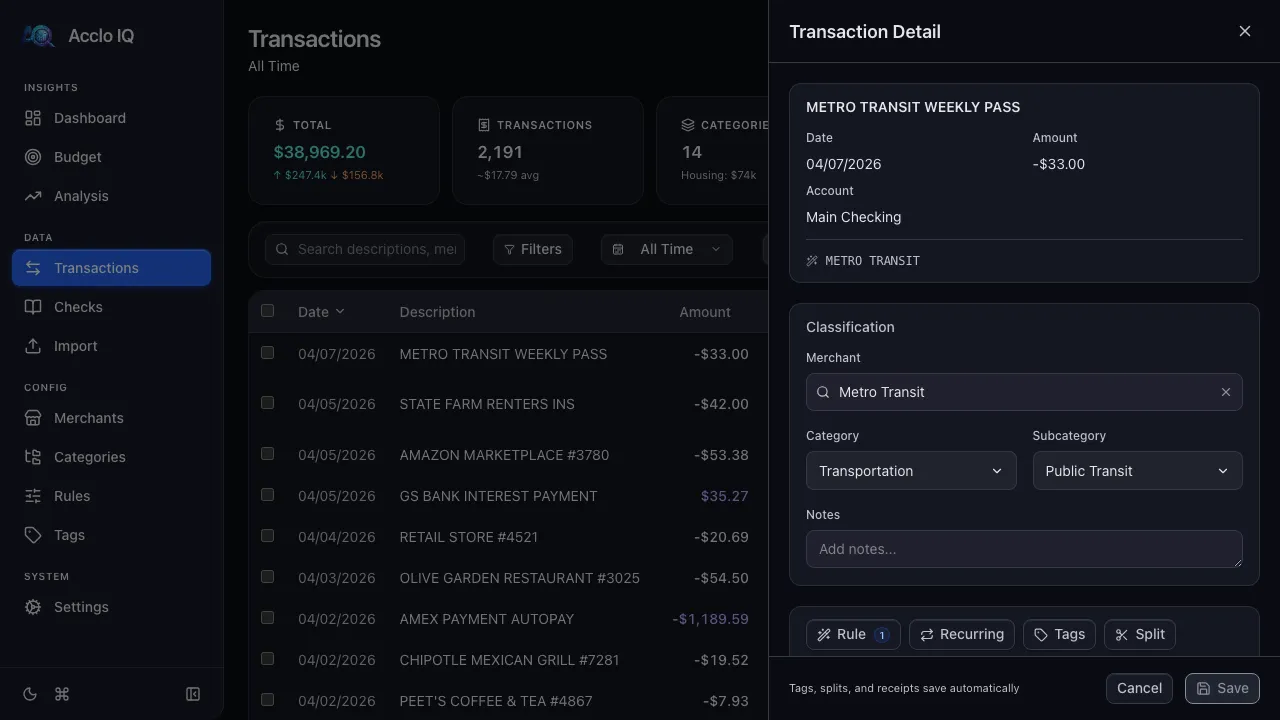
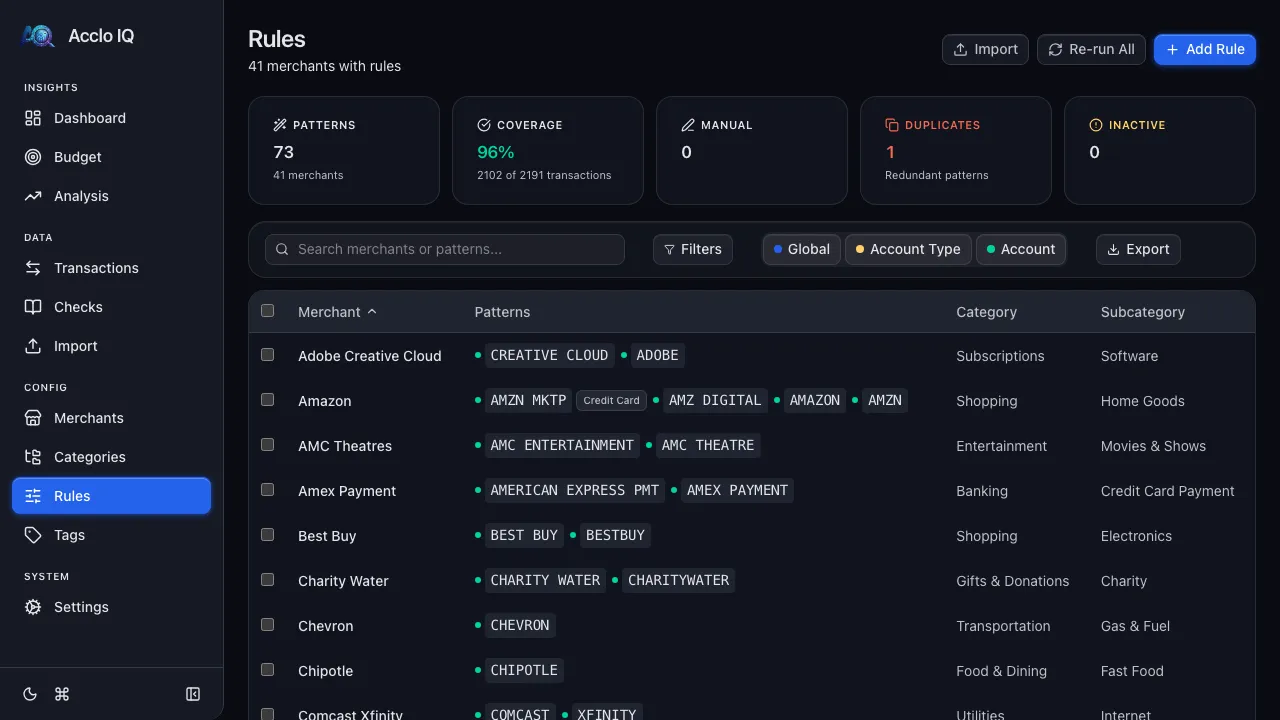
Section titled “Review and Fix Categories”The rule engine handles most categorization automatically, but it won’t catch everything — especially transactions from lesser-known merchants. Head to Transactions to review.
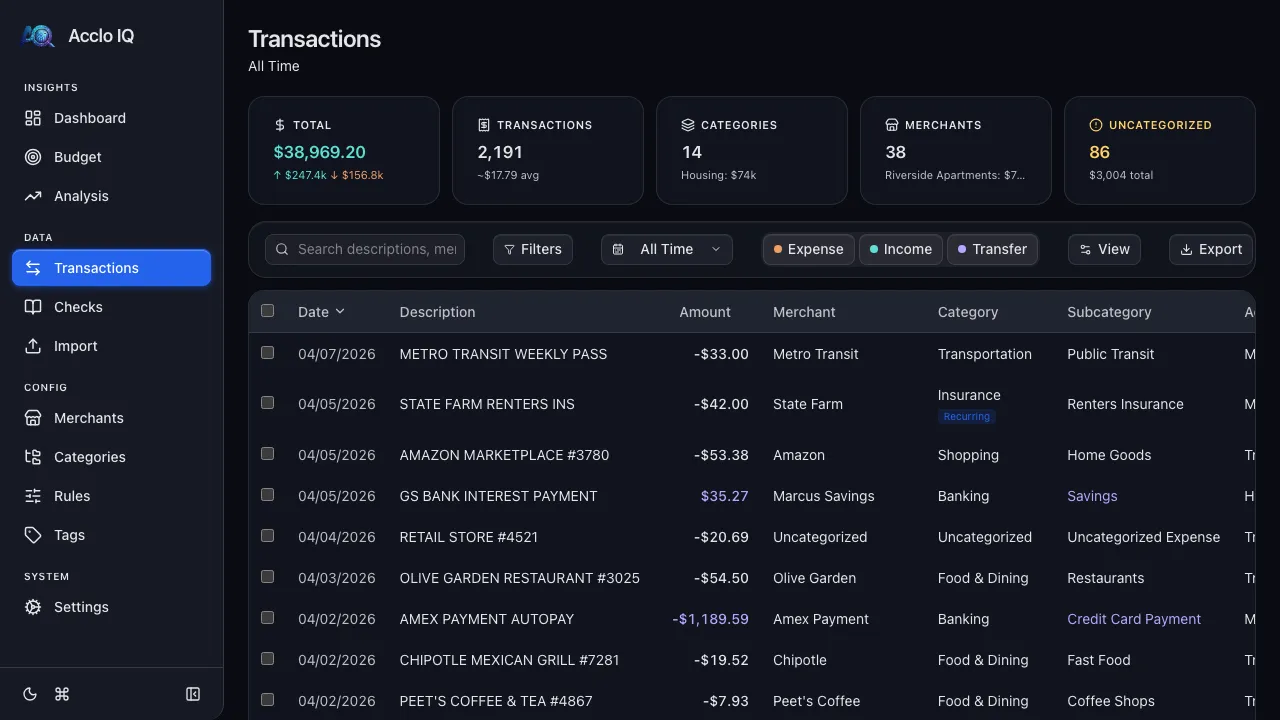
Click any transaction to open the detail panel. From here you can:
- Change the merchant — start typing to search existing merchants
- Fix the category and subcategory — select from the dropdown
- Add notes — free-text annotations for your reference
Set Up Budgets (Optional)
Section titled “Set Up Budgets (Optional)”Once your transactions are categorized, you can set monthly spending targets. Go to Budget > Setup.

- Find a category and click Set budget to enter a monthly amount
- Choose between category-level budgets (one amount for the whole category) or subcategory-level budgets (individual amounts)
- The Overview tab shows your progress in real time with color-coded bars
See the Budgets guide for the full walkthrough.
What’s Next
Section titled “What’s Next”You’ve got the basics covered. Here’s where to go from here:
- Bank Sync — (Pro) connect to thousands of banks for automatic imports, no more CSV downloads
- Recurring Detection — auto-detect subscriptions and recurring charges
- Analysis — pivot tables, heatmaps, and year-over-year comparisons
- Tags — organize transactions with custom labels
- Cloud Sync — (Pro) encrypted sync across devices via your cloud drive
- Backup & Restore — export your data anytime