Rules Engine — Regex Auto-Categorization
Overview
Section titled “Overview”The rule engine automatically assigns merchants and categories to imported transactions by matching their descriptions against regex patterns. Well-configured rules mean most transactions are categorized the moment they’re imported.
How Rules Work
Section titled “How Rules Work”When a transaction is imported (via CSV or Bank Sync), the rule engine:
- Tests the transaction description against every active regex pattern
- Finds the highest-priority matching rule
- Assigns the rule’s merchant, category, and subcategory to the transaction
If no rule matches, the transaction is left as “Uncategorized.”
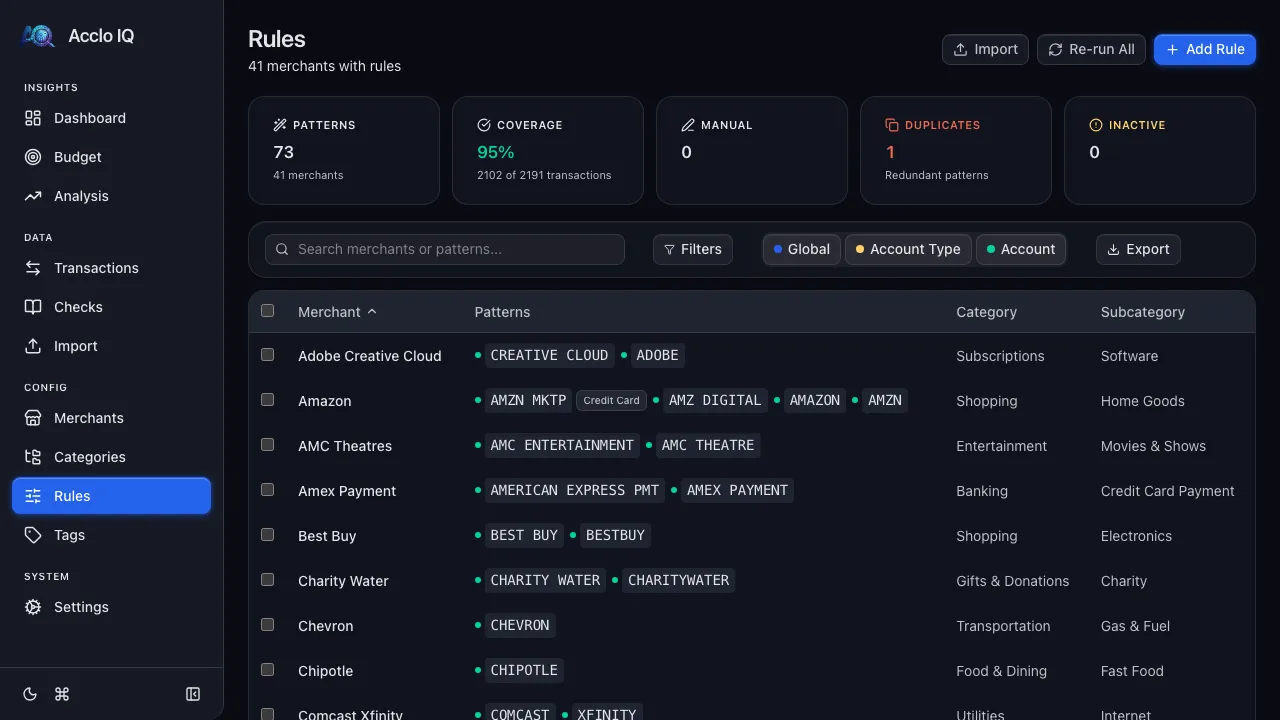
Summary Cards
Section titled “Summary Cards”Five cards at the top of the Rules page:
| Card | Description |
|---|---|
| Patterns | Total pattern count across all merchants |
| Coverage | Percentage of transactions matched by rules |
| Manual | Transactions manually overridden (clickable — navigates to Transactions filtered by manual overrides) |
| Duplicates | Redundant patterns (red if > 0, clickable to filter) |
| Inactive | Disabled patterns (yellow if > 0, clickable to filter) |
Rules Table
Section titled “Rules Table”Each row represents a merchant with one or more regex patterns:
| Column | Description |
|---|---|
| Merchant | Merchant name |
| Patterns | Regex patterns shown as monospace code badges, each with a health indicator dot and optional scope badge |
| Category | Assigned category |
| Subcategory | Assigned subcategory |
Click any row to open the detail panel for editing.
Health Indicators
Section titled “Health Indicators”Each pattern has a colored dot showing regex performance:
- Green — fast (under 100ms)
- Orange — moderate (100–500ms)
- Red — slow (over 500ms, consider simplifying)
- Gray — inactive (disabled)
Scope Badges
Section titled “Scope Badges”Patterns can have different scopes, shown as badges:
- No badge — Global (matches in all accounts)
- Account type badge (e.g., “Credit Card”) — matches only in that account type
- Account name badge — matches only in that specific account
Three-Tier Scoping
Section titled “Three-Tier Scoping”Rules use a priority system with three tiers:
- Account-specific (highest priority) — matches only in one specific account
- Account type-scoped — matches in all accounts of a type (e.g., all Credit Card accounts)
- Global (lowest priority) — matches in all accounts
If a transaction matches rules at multiple tiers, the most specific rule wins. Within the same tier, longer patterns take priority.
Use the scope pills in the toolbar (Global, Account Type, Account) to filter which tiers are displayed.
Creating a Rule
Section titled “Creating a Rule”From the Rules Page
Section titled “From the Rules Page”- Click + Add Rule in the page header
- Enter a regex pattern (e.g.,
TRADER JOE) - Enter or select a merchant name
- Select a category and subcategory
- Choose a scope (Global, Account Type, or Specific Account)
- Click Check conflicts to validate the pattern and check for overlaps with existing rules
- Click Create Rule
From a Transaction
Section titled “From a Transaction”- Open any transaction in the detail panel on the Transactions page
- Click the Rule button (magic wand icon)
- The form auto-suggests a pattern, merchant, and category based on the transaction
- Adjust as needed and click Create Rule
Editing a Rule
Section titled “Editing a Rule”Click any row in the rules table to open the detail panel:
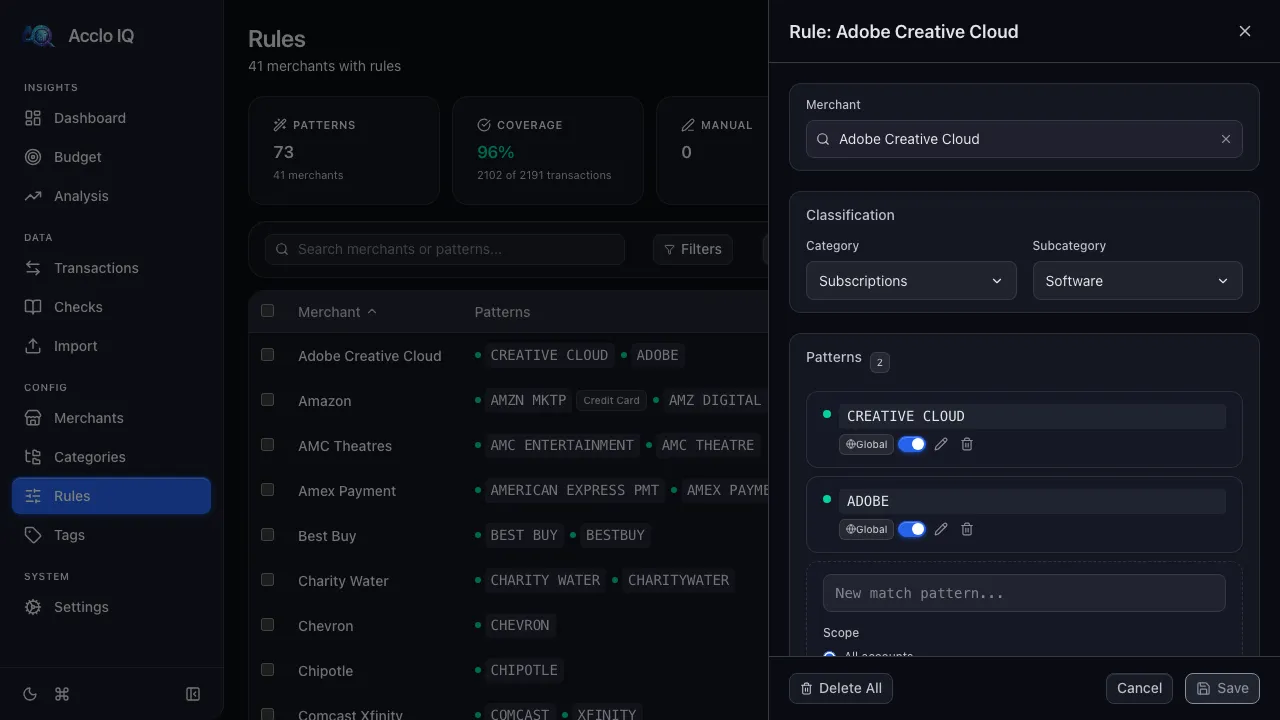
- Merchant — change or rename the merchant
- Classification — update category and subcategory
- Patterns — add, edit, disable, or delete individual patterns
Adding a Pattern to an Existing Merchant
Section titled “Adding a Pattern to an Existing Merchant”In the detail panel, scroll to the Patterns section and use the Add pattern form at the bottom. Enter the regex, select a scope, check for conflicts, and click Add Pattern.
Editing a Pattern
Section titled “Editing a Pattern”Click the edit (pencil) icon on any pattern to enter inline edit mode. Change the regex text or scope, check conflicts, then click Done.
Disabling a Pattern
Section titled “Disabling a Pattern”Toggle the switch on any pattern to disable it without deleting. Disabled patterns are grayed out and do not match transactions.
Pattern Validation
Section titled “Pattern Validation”The rule engine validates patterns before saving:
- Must not be empty (max 200 characters)
- Must be valid regex syntax
- No nested quantifiers (e.g.,
(a+)+) — prevents catastrophic backtracking - No chained greedy quantifiers (e.g.,
.*.*.*)
The Check conflicts button tests the pattern against existing rules and reports any overlaps.
Importing and Exporting Rules
Section titled “Importing and Exporting Rules”Export
Section titled “Export”Click Export in the page header to download all rules as a rules.json file. This includes merchants, patterns, categories, and scopes.
Import
Section titled “Import”Click Import and upload a rules.json file. The import shows a preview:
- New — merchants that will be created
- Updated — existing merchants whose patterns will be updated
- Unchanged — merchants already matching
Review the preview and click Import N rules to confirm.
Re-running Rules
Section titled “Re-running Rules”Click Re-run All to re-categorize all transactions using the current rules. This is useful after adding or updating rules to retroactively categorize old transactions.
Re-run only affects transactions that were not manually overridden. A confirmation dialog shows before proceeding, and results report how many transactions were recategorized.
- Start broad: a pattern like
STARBUCKSmatches “STARBUCKS #1234” and “STARBUCKS STORE 567” - Use regex features sparingly — simple substring matches cover most cases
- Check the Coverage card to track how many transactions are auto-categorized
- Check for Duplicates (redundant patterns across merchants) periodically
Related Guides
Section titled “Related Guides”- Categories — manage the categories that rules assign
- Transactions — view and manually categorize transactions
- CSV Import — rules run automatically during import
- Format Profiles — configure how CSVs are parsed